Before you start the engine or move away, you need to make sure that you can control the car safely and see what is happening around it. This is the purpose of the pre-drive cockpit safety routine, often called the cockpit drill.
For learner drivers, completing the routine in the same order at the start of every lesson helps turn several separate checks into one reliable habit. It also prevents distractions later. You do not want to discover that your seat is too far from the pedals or that a mirror is badly positioned while the car is moving.
A commonly taught sequence is DSSSM: doors, seat, steering, seat belt and mirrors. The exact wording used by instructors may vary, but the safety principles remain the same.
Why the cockpit routine matters
A correct driving position helps you operate the pedals and steering wheel smoothly. Properly adjusted mirrors improve your view around the vehicle, while a correctly fitted seat belt and head restraint help protect you if a collision occurs.
The routine is especially important when someone else has used the car. A driving instructor’s vehicle may be driven by several learners of different heights, so never assume that the previous settings will suit you.
Even in your own car, the position may have changed after another driver used it, the vehicle was cleaned or an item was placed behind the seat. Treat the routine as an essential check rather than something you only do during lessons.
1. Check that the doors are secure
Start by confirming that your door is properly closed. Ask passengers to check theirs, and use the dashboard warning display if the vehicle has one.
A door that looks closed may not be fully latched. If you are unsure, open it and close it firmly while the car is stationary. Before opening a door, check that doing so will not endanger a cyclist, motorcyclist, pedestrian or another road user.
As the driver, you are responsible for making sure children under 14 wear a seat belt or use the correct child restraint where required. You should also make sure passengers and loose belongings will not interfere with your control of the vehicle.
Do not allow bags, bottles or other objects to sit around the pedals. In a sudden stop, unsecured items can move through the cabin and become a distraction or hazard.
2. Adjust the driving seat
Your seat position affects how effectively you can brake, change gear and steer. Adjust it before fastening your seat belt, as moving the seat afterwards can alter how the belt fits.
Set the distance from the pedals
Move the seat forwards or backwards until you can fully press the clutch pedal in a manual car without stretching. Your left leg should retain a slight bend when the clutch is fully depressed.
In an automatic car, check that you can press the brake pedal firmly and fully while remaining comfortably supported by the seat. You should not need to slide forwards or twist your body.
Being too far back may prevent you from applying full pressure quickly. Sitting too close can make your movements cramped and reduce comfortable control.
Adjust the seat height and backrest
If the vehicle has seat-height adjustment, choose a position that gives you a clear view of the road and instruments. You must still have sufficient clearance between your head and the roof.
Set the backrest so that your back and shoulders remain supported. It should not be reclined so far that you have to lean forwards to steer.
Check that you can reach all essential controls without lifting your shoulders away from the seat. This includes the gear lever, parking brake or switch, indicators, wipers and lights.
Position the head restraint
The head restraint is a safety feature, not a cushion for comfort. Adjust it so that its rigid part is at least as high as your eyes or the top of your ears and is as close to the back of your head as is comfortable.
A badly positioned head restraint may provide less protection against neck injury in a collision. Check passenger head restraints as well, particularly if they have been lowered or removed.
3. Check your steering position
Once the seat is set, confirm that you can use the steering wheel without stretching or locking your elbows. Your arms should remain slightly bent when holding the wheel.
If the steering wheel can be adjusted for height or reach, set it while the vehicle is stationary. Make sure it does not obstruct your view of important instruments and that you can still operate the pedals comfortably.
After adjusting it, lock the steering column securely. Never attempt to change the steering wheel position while driving.
Your hands should be able to move around the wheel smoothly without hitting your legs. Avoid sitting so close that the wheel restricts movement. If you cannot find a safe, comfortable position, ask your instructor to help rather than accepting a poor setup.
4. Fasten and check your seat belt
Pull the seat belt across your body and insert the tongue into the buckle until it locks. Give the belt a gentle pull to confirm that it is secure.
The lap section should sit low across your hips, not across your stomach. The diagonal section should pass across your chest and shoulder rather than against your neck or beneath your arm.
Remove twists and avoid wearing the belt over bulky items in your pockets. Thick coats can also affect how closely the belt fits, so adjust it carefully.
Unless an exemption applies, the driver and passengers must wear seat belts where fitted. Do not set off until everyone who needs to be restrained is secure.
5. Adjust all mirrors
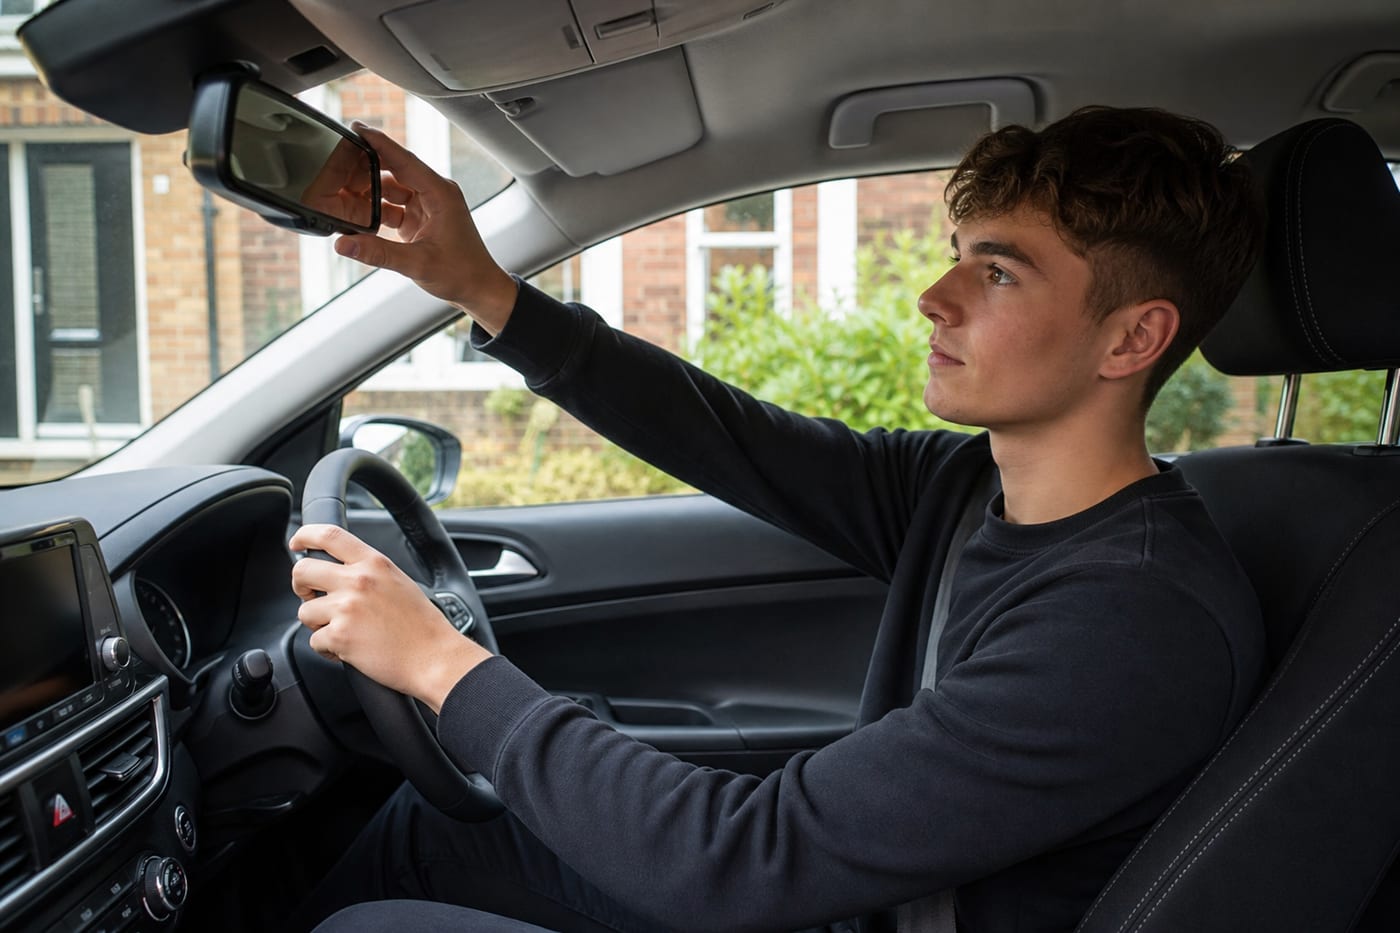
Mirrors should be adjusted only after the seat and steering position have been finalised. If you move your seat later, check the mirrors again.
Interior mirror
Set the interior mirror to give the best possible view through the rear window. Hold the mirror by its edge to reduce the chance of leaving fingerprints on the glass.
You should be able to glance at it without making a large head movement. Remember that it provides a view behind the vehicle but cannot show every surrounding area.
Exterior mirrors
Adjust both exterior mirrors to provide useful views along the sides and behind the car. A small part of your own vehicle may be visible as a reference, but the mirrors should not be dominated by its bodywork.
Mirror adjustment does not remove blind spots. Before moving away, changing direction or carrying out a manoeuvre, you may need direct observations into areas the mirrors cannot show.
If rain, frost, condensation or dirt prevents a clear view, clean or demist the mirrors and windows before driving. Our festive winter driving safety advice explains further precautions for darkness, ice and poor seasonal weather.
6. Familiarise yourself with the controls
If the car is unfamiliar, identify its essential controls before starting your journey. These include:
- The indicators and hazard warning lights
- Dipped and main-beam headlights
- Windscreen wipers and washers
- Front and rear demisters
- The horn
- The parking brake
- The gear selector
- Heating and ventilation controls
Dashboard layouts differ between vehicles. Learning where everything is while parked means you are less likely to look away from the road for too long when driving.
Check that the gear lever is in neutral before starting a manual car, following the procedure taught by your instructor and recommended for the vehicle. In an automatic, make sure the selector is in the correct starting position, normally park or neutral, and press the required pedal.
Look at the dashboard after starting the engine. Warning lights usually illuminate briefly as part of the system check, but a warning that remains on may indicate a problem. If you do not understand a symbol, consult the vehicle handbook or ask your instructor. Do not simply ignore it.
The cockpit routine complements, rather than replaces, checks outside and under the bonnet. Learners who want to understand routine maintenance can use this beginner’s guide to checking vital engine fluids.
7. Make observations before moving
Completing the cockpit drill does not mean the car is ready to move immediately. First, prepare the vehicle as you have been taught, then assess the surroundings using your mirrors and direct observations.
Look for pedestrians, cyclists, motorcyclists, approaching vehicles and anyone who may enter your path. Pay particular attention to blind spots and to small children who may be difficult to see.
Signal only if it would help another road user understand what you intend to do. When there is a safe opportunity, move away with appropriate control and continue checking the developing situation.
Avoid turning the routine into a rushed performance for the practical test. It should be a genuine safety process used on every drive. For wider test-day preparation, see these strategies for your practical driving test.
Common cockpit drill mistakes
One frequent mistake is adjusting the mirrors before the seat. As soon as you move the seat, the mirror view changes, so use the correct order.
Other common problems include:
- Sitting too far away from the pedals
- Reclining the backrest excessively
- Forgetting to adjust the head restraint
- Allowing the seat belt to remain twisted
- Assuming every door is closed
- Setting off without checking blind spots
- Leaving loose objects near the pedals
- Trying to adjust controls after moving
If you repeatedly miss one stage, pause after each check and say the sequence silently: doors, seat, steering, seat belt, mirrors. With practice, it will become automatic without becoming careless.
A simple pre-drive checklist
Before every journey, ask yourself:
- Are all doors properly closed?
- Can I reach and fully operate the pedals?
- Are my seat, backrest and head restraint correctly positioned?
- Can I steer comfortably with slightly bent arms?
- Is my seat belt secure, correctly routed and untwisted?
- Do all mirrors provide the best available view?
- Are the windows and mirrors clear?
- Do I know where the essential controls are?
- Are passengers, children and loose items secure?
- Have I completed effective observations before moving?
Frequently asked questions
What does DSSSM mean in driving lessons?
DSSSM is a commonly used cockpit-drill reminder. It stands for doors, seat, steering, seat belt and mirrors. Some instructors may teach a slightly different sequence, but it should cover the same essential safety checks.
Should I adjust the seat or mirrors first?
Adjust the seat first, followed by the steering position where adjustable, and then set the mirrors. Changing your seating position alters your viewpoint, so mirrors adjusted beforehand may no longer give the correct view.
Do I need to repeat the cockpit routine every time I drive?
Yes, although it may take only a few moments in a familiar car. You should still confirm that the doors, seat belt and mirrors are secure and correctly positioned. Carry out a more detailed adjustment whenever another person has driven the vehicle.
Can I adjust my seat or mirrors while driving?
You should make all adjustments while stationary. Trying to alter the seat or steering wheel while moving can cause a loss of control, while adjusting mirrors can distract you. Stop somewhere safe and legal if a setting needs correction.
Conclusion
The pre-drive cockpit safety routine creates the foundation for safe vehicle control. Check the doors, establish a comfortable seat and steering position, fasten your seat belt, adjust the mirrors and understand the controls before moving.
Use the same sequence on every journey, but do not let familiarity lead to rushing. A few careful checks before setting off can prevent avoidable distractions and help you begin each drive safely and confidently.