

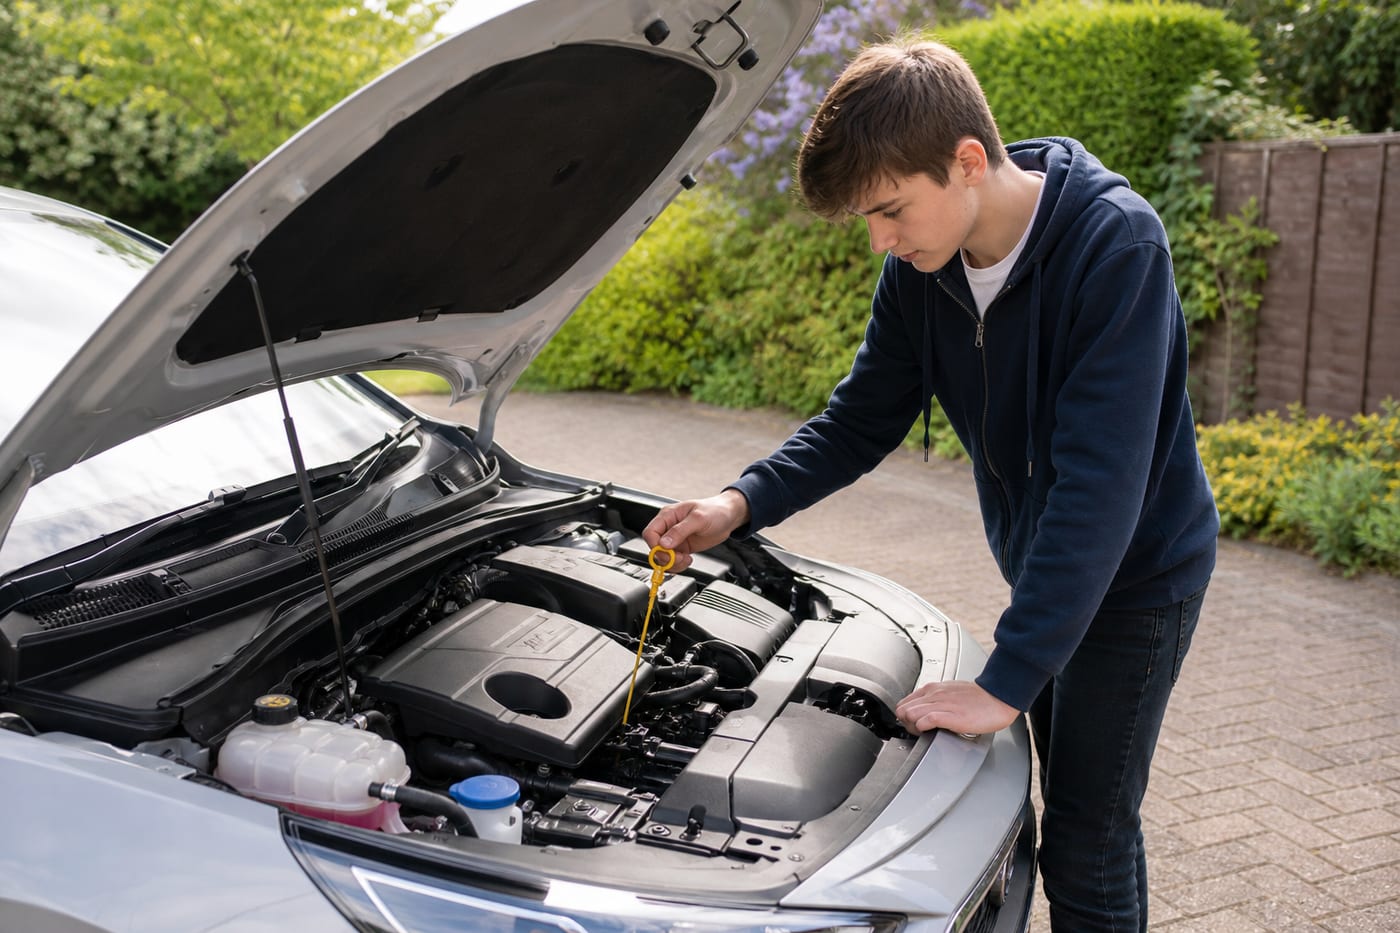
Checking your car’s vital fluids is a simple maintenance habit that can help you spot problems before they become expensive or dangerous. You do not need to be a mechanic: in most cases, you are simply confirming that a fluid sits between the minimum and maximum marks and looking for signs of a leak or contamination.
For learner drivers, these checks are also useful preparation for the practical driving test. Some of the test’s vehicle safety questions require you to explain how you would check fluid levels safely. More importantly, understanding basic maintenance will help you look after a car once you begin driving independently.
Every vehicle is different, so treat this guide as a starting point and follow the manufacturer’s handbook for your particular car.
Why engine fluid checks matter
A car relies on several fluids to lubricate components, control temperature, operate safety systems and keep the windscreen clear. If a level becomes too low, the vehicle may become unreliable or unsafe.
Regular checks can help you identify:
- A developing fluid leak
- Excessive engine oil consumption
- A cooling-system problem
- Worn brake components or a possible brake fluid leak
- An empty screen wash bottle
- A steering-system fault on cars with hydraulic power steering
Checking levels does not replace servicing. Fluids can deteriorate with age even when the quantity appears correct, so they must still be replaced at the intervals specified by the manufacturer.
Before opening the bonnet
Park on firm, level ground away from moving traffic. Apply the parking brake, select neutral in a manual car or park in an automatic, switch off the engine and remove the key if appropriate.
Allow the vehicle to cool before checking anything near hot engine components. Loose clothing, jewellery and long hair should be kept away from belts, fans and other moving parts. Bear in mind that an electric cooling fan may sometimes operate even when the engine is not running.
Locate the bonnet release, which is normally inside the passenger compartment, and then release the secondary catch beneath the front edge of the bonnet. Secure the bonnet using its stay, unless it has self-supporting struts. Check that it is firmly supported before leaning over the engine bay.
Your handbook will show where each reservoir is located and specify the correct fluids. Never rely only on reservoir cap colours, as these vary between vehicles.
How to check the engine oil
Engine oil lubricates moving parts, reduces friction and helps protect the engine. An insufficient level can cause serious damage, while adding too much can also create mechanical problems.
Many cars have a dipstick, although some newer vehicles use an electronic oil-level display.
Checking oil with a dipstick
Follow the handbook’s instructions about whether the engine should be cold or allowed to stand for a few minutes after running. The usual process is:
- Park the car on level ground and switch off the engine.
- Wait for the oil to settle as directed by the manufacturer.
- Remove the dipstick and wipe it with a clean, lint-free cloth or paper towel.
- Insert it fully into its tube.
- Remove it again and examine the oil level.
The oil should sit between the minimum and maximum marks. If it is close to or below minimum, use the grade and specification stated in the handbook. Add a small quantity through the oil filler cap, wait for it to settle and check again. Do not pour in a large amount at once or fill above the maximum mark.
Oil naturally becomes darker with use, so colour alone does not necessarily mean it needs replacing. However, a sudden drop in level, visible leakage, a strong fuel smell or a creamy deposit may indicate a fault that needs professional attention.
Cars with an electronic oil monitor
Use the vehicle’s menu or dashboard procedure exactly as described in the handbook. The car may need to be level, at a particular temperature or switched off for a specified period before it gives an accurate reading.
Do not assume an electronic warning replaces routine checks. An oil pressure warning light can indicate an urgent problem rather than a normal reminder to top up. If a red oil warning appears while driving, stop safely and switch off the engine as soon as possible, then follow the handbook or seek assistance.
How to check engine coolant
Coolant absorbs heat from the engine and helps prevent freezing and corrosion within the cooling system. It is normally visible through a translucent expansion tank marked with minimum and maximum levels.
Only check coolant when the engine is cold. A hot cooling system is pressurised, and opening its cap can release scalding liquid or steam.
With the car level and the engine cold, look through the side of the reservoir. The fluid should be between the marked limits. You usually do not need to remove the cap simply to inspect the level.
If topping up is necessary, use coolant that meets the vehicle manufacturer’s specification. Coolants are available in different formulations, and colour is not a reliable way to determine compatibility. Do not mix products unless the manufacturer confirms that they are suitable.
A small emergency addition of water may sometimes be permitted by the handbook, but it can weaken frost and corrosion protection. The correct coolant mixture should be restored as soon as possible.
Repeated coolant loss is not normal. Damp patches, coloured deposits, a sweet smell, steam or an overheating warning can point to a leak or another cooling-system fault. Stop if the vehicle overheats and seek professional advice rather than continuing to drive.
Coolant is harmful if swallowed and can endanger children and animals, so wipe up spills promptly and store it securely.
How to check brake fluid
Brake fluid transfers pressure through the hydraulic braking system. The reservoir is usually mounted towards the rear of the engine compartment and has minimum and maximum markings.
Park on level ground and inspect the level through the reservoir without removing its cap unnecessarily. It should be between the marks. Brake fluid absorbs moisture from the air, so repeatedly opening the container or reservoir can reduce its quality.
A gradual change in the reservoir level can occur as brake pads wear, but a low or rapidly falling level could indicate worn components or a leak. Do not simply top it up and ignore the cause. Braking is a critical safety system, so have the car inspected by a qualified professional.
Use only the brake fluid specification listed in the handbook. The wrong type may damage the system. Brake fluid can also harm paintwork, so avoid spilling it and clean any spill according to the manufacturer’s guidance.
Some manual cars use the same reservoir for the hydraulic clutch. Your handbook will identify the arrangement.
How to check and top up screen wash
Screen wash helps remove dirt, insects, salt and road spray from the windscreen. Good visibility is essential in every season, particularly during wet winter journeys.
Find the screen wash reservoir using the handbook or its windscreen-washer symbol. Unlike several other reservoirs, it may not have obvious minimum and maximum lines because its shape can extend down into the engine bay.
Top it up with a suitable screen wash mixture, following the product instructions for the season. Proper screen wash cleans more effectively than plain water and can provide freezing protection when mixed at the recommended concentration. Do not use household washing-up liquid, which may foam, smear or affect vehicle materials.
After topping up, close the cap and test the washers. Check that the jets direct fluid onto the windscreen and that the wipers clear it effectively. If you are preparing for cold conditions, our festive winter driving advice covers additional checks for ice, darkness and difficult weather.
Does every car have power steering fluid?
No. Many modern vehicles use electric power-assisted steering and therefore have no power steering fluid reservoir.
A car with hydraulic power steering may have a marked reservoir in the engine bay. Check it using the method stated in the handbook, as some systems must be inspected when cold and others have different hot and cold markings. Use only the specified fluid.
Heavy steering, whining noises, foam in the reservoir or a falling fluid level could indicate a fault. Because steering is safety-critical, arrange an inspection rather than repeatedly topping up the system.
What about transmission fluid and AdBlue?
Automatic transmission fluid is vital, but it is not always intended for routine owner checking. Some cars have a dipstick; others have sealed systems requiring particular temperatures, tools or workshop procedures. Never guess. Consult the handbook and leave the check to a garage if specialist equipment is required.
AdBlue is used by many diesel vehicles to reduce exhaust emissions. It is stored separately from fuel and engine oil. The dashboard normally warns when the level is getting low, and the handbook explains where and how to refill it. Take care not to put AdBlue into the diesel tank or diesel into the AdBlue tank.
Hybrid and electric vehicles also have manufacturer-specific cooling systems. High-voltage components should never be touched by an untrained person. Limit your checks to those described as owner maintenance in the handbook.
Build a simple fluid-checking routine
Checking fluids before every journey is usually unnecessary, but getting into a regular routine makes it easier to notice changes. Check more frequently before a long trip, after a warning message, when you notice a patch beneath the car or if the vehicle seems to be behaving differently.
A useful routine is to:
- Keep the handbook in the car or save a digital copy
- Check levels on the same flat parking space
- Record the date and mileage when topping up
- Carry only correctly specified fluids in sealed containers
- Look beneath the parked car for fresh leaks
- Investigate repeated fluid loss promptly
Before travelling a long distance, combine fluid checks with tyre pressure, tread, lights, wipers and fuel or charge planning. Our UK holiday road trip safety tips provide a broader pre-journey checklist.
If you have recently passed, basic vehicle care should form part of your new driving routine alongside insurance, journey planning and safe decision-making. The essential guidelines for newly licensed drivers explain other important responsibilities after passing your test.
Fluid checks and the practical driving test
At the start of the practical test, the examiner will ask one “tell me” vehicle safety question. You may need to explain how you would check a fluid level, and an incorrect answer can result in a driving fault.
Learn on the car used for your test. Practise identifying the oil dipstick or electronic display, coolant expansion tank and brake fluid reservoir. You should be able to explain that the vehicle must be on level ground where relevant and that the level is checked against the minimum and maximum markings.
Do not memorise only a spoken answer. Ask your instructor to show you the real components so that you understand what the answer means.
Frequently asked questions
How often should I check my car’s fluid levels?
Follow the vehicle handbook and check more often before long journeys or if you notice warnings, leaks or unusual behaviour. A regular visual inspection can help you recognise a change before it becomes serious.
Can I check engine fluids immediately after driving?
Not all of them. Coolant must not be opened while hot, and engine oil may need time to settle. The correct procedure varies by vehicle, so park safely, allow the engine to cool and follow the handbook.
Is it safe to drive when a fluid is below the minimum mark?
Do not assume that it is. Low oil, coolant, brake fluid or steering fluid can indicate a fault and may cause damage or affect safety. Follow warning-light instructions, top up only when appropriate and seek professional help if the loss is unexplained.
Can I use any brand of fluid in my car?
The brand is less important than using the exact specification required by the manufacturer. Check the handbook and the product label. Never choose coolant, oil or brake fluid solely by colour or appearance.
Conclusion
Vital fluid checks are quick once you know where everything is. Work on level ground, keep clear of hot or moving components, use the correct specifications and never ignore repeated fluid loss. By combining these checks with routine servicing and professional attention when something looks wrong, you can protect your car and make every journey safer.